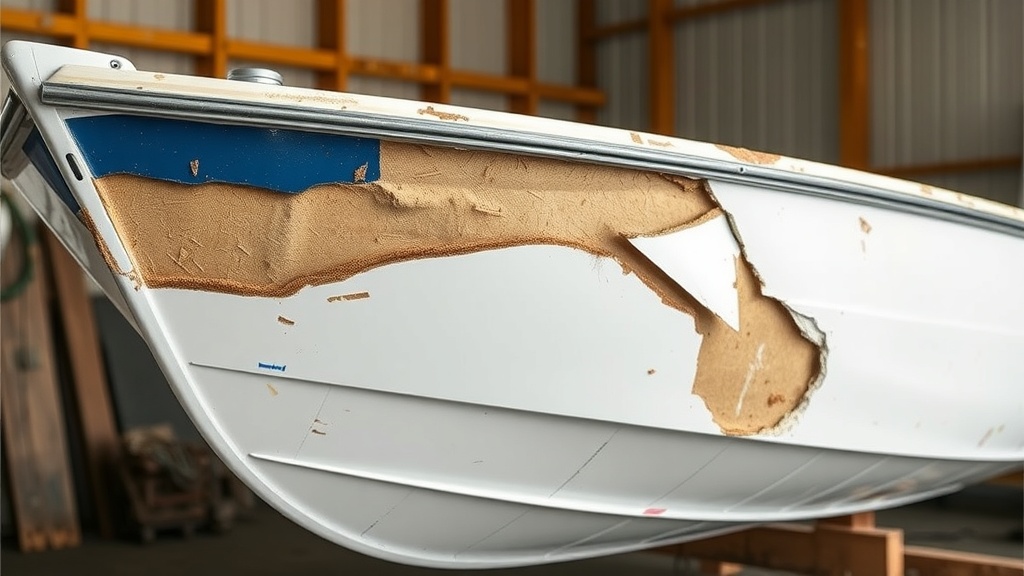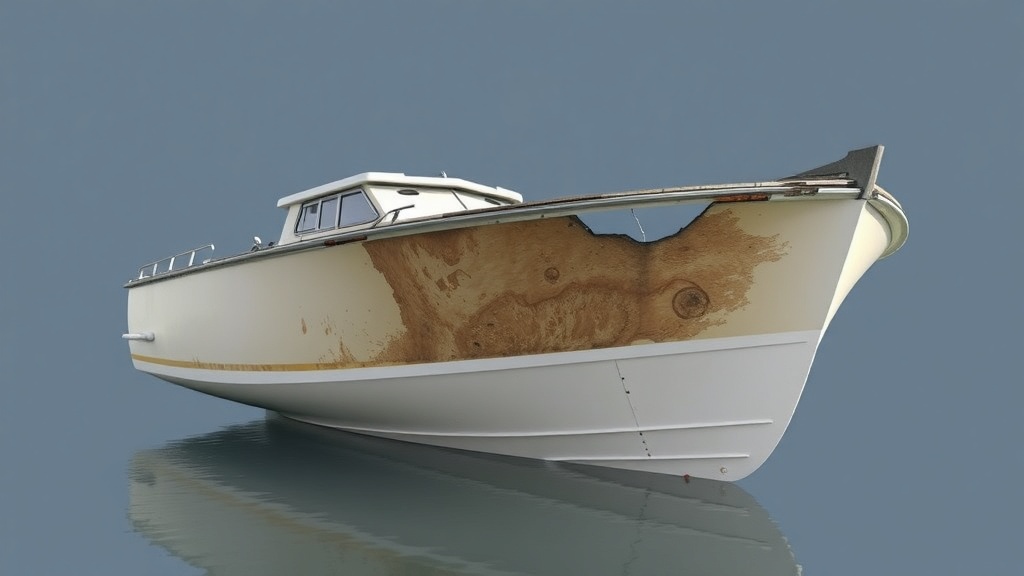
Effective Techniques for Repairing the Fiberglass Boat Hull from the Outside
When you notice cracks or damage in the fiberglass hull of your boat, it’s essential to address the issue promptly. Repairing your fiberglass boat hull from the outside can seem daunting, but with the right techniques, you can restore its integrity and appearance. Here are some effective methods to help you get started.
Assessing the Damage
Before diving into repairs, take a good look at the damaged area. Understand the extent of the cracks or chips. Here’s how to assess the damage:
- Visual Inspection: Check for visible cracks, chips, or blisters.
- Tapping Test: Gently tap around the damaged area. A hollow sound may indicate underlying issues.
- Water Test: If possible, spray water on the affected section. If water seeps through, it’s a sign that you need more extensive repairs.
Gathering Materials
Equipping yourself with the right materials is crucial for a successful repair. Here’s a list of what you will need:
- Fiberglass Repair Kit: These kits usually contain resin, hardener, and fiberglass cloth.
- Sandpaper: Use various grits, typically from 80 to 400.
- Masking Tape: Helps in protecting surrounding areas.
- Acetone: Essential for cleaning the surface before repairs.
- Protective Gear: Safety goggles, gloves, and a dust mask are important.
Preparing the Surface
The success of your repair heavily relies on how well you prepare the surface. Follow these steps:
- Start by cleaning the area thoroughly with acetone to remove any grease or contaminants.
- Use sandpaper to lightly sand the damaged area and about 1-2 inches around it. This helps the resin adhere better.
- Remove any dust from sanding by wiping it with a clean cloth.
Applying the Fiberglass Repair
Once the surface is clean and prepped, it’s time to apply the fiberglass repair components. Here’s how to do it effectively:
- Mix the Resin: Follow the instructions on your fiberglass repair kit carefully when mixing the resin and hardener.
- Apply Fiberglass Cloth: Cut a piece of fiberglass cloth to cover the damaged area. Place it over the defect and apply a layer of resin on top.
- Layering: If the damage is significant, additional layers may be necessary. Be sure to let each layer cure as per the manufacturer’s instructions.
Sanding and Finishing
After the repair has cured adequately, it’s essential to smooth out the area for aesthetic purposes. Here’s what to do next:
- Use coarse sandpaper (around 80 grit) to smooth out any unevenness, then gradually move to finer grits (up to 400).
- Be careful not to sand too much, as you want to preserve the surrounding gel coat.
- polish the area with a marine-grade polish to restore shine and match the rest of the hull.
Regular Maintenance
After successfully repairing your fiberglass hull, don’t forget the importance of regular maintenance. Clean your boat frequently, check for any signs of new damage, and always address minor repairs before they escalate. Regular inspections can save you from facing bigger issues down the road.
By following these steps and using the correct methods, you can effectively repair your fiberglass boat hull from the outside. This can enhance the longevity of your vessel and ensure safe sailing experiences for years to come.
Common Mistakes to Avoid When Fixing a Fiberglass Boat Hull
When you set out to repair a fiberglass boat hull, it can be easy to make mistakes that could lead to more significant problems down the line. Understanding these common pitfalls can help you execute repairs more effectively and keep your vessel in top shape. Here’s a comprehensive look at the common mistakes to steer clear of when tackling fiberglass hull repairs.
Skipping the Inspection Process
Before diving into repairs, it’s essential to inspect the hull thoroughly. Many boat owners make the mistake of starting repairs without checking for underlying issues. Cracks and holes might not reveal the full extent of damage. Look for signs of delamination or water intrusion. Skipping this step can lead to patching over problems that will worsen over time.
Using Inappropriate Materials
Choosing the right materials is crucial in fiberglass repairs. Using standard polyester resin instead of epoxy for more extensive repairs can lead to weak spots. Always opt for high-quality marine-grade products designed specifically for boat repairs. Here are the materials to consider:
- Marine Epoxy: Best for structural repairs.
- Polyester Resin: Suitable for less critical or cosmetic repairs.
- Fiberglass Cloth: Ensure it is the right weight for the repair area.
Neglecting Proper Preparation
Preparation is key to a successful fiberglass repair. Many people overlook the cleaning and sanding process. Ensure you sand down the area around the damage to create a good bonding surface. Remove any debris, loose paint, and old resin. This prevents the new resin from adhering properly and may compromise the repair.
Applying Too Much or Too Little Resin
It’s essential to use the right amount of resin when making repairs. Applying too thick a layer can lead to bubbles and uneven surfaces, while too little resin leaves the area weak and unprotected. Follow the manufacturer’s guidelines for application thickness, and consider multiple layers if necessary. Keep in mind that a smooth finish involves crafting layers carefully.
Rushing the Curing Time
After applying resin, patience is a virtue. Many repair attempts fail because the person is too eager to finish the job. Rushing the curing process can result in poor adhesion. Always follow the recommended curing times, and in cooler weather, allow for extra time. This will ensure that your repair sets correctly and has maximum strength.
Ignoring Safety Precautions
Fiberglass repairs involve handling potentially hazardous materials, and safety should never be an afterthought. Common safety mistakes include neglecting to wear gloves, goggles, or a mask when working with fiberglass and resin. Always ensure good ventilation in your workspace and take breaks as needed. Your health is paramount, so prioritize safety at all times.
Forgetting to Finish the Surface
A common oversight in fiberglass repairs is forgetting to smooth and finish the surface after curing. Once the repair has cured completely, sand the area for a smooth finish. Apply a gel coat or paint to blend the repair with the rest of the hull. This not only makes your repair look professional but also provides an extra layer of protection against UV rays.
Not Seeking Professional Help
If you find yourself in over your head, don’t hesitate to look for professional assistance. Tackling complex repairs without sufficient knowledge or experience can lead to costly mistakes. A marine maintenance expert can provide valuable insights and help ensure your repairs are done correctly. You’ll save time and possibly money in the long run by getting it done right the first time.
Knowing what mistakes to avoid when repairing a fiberglass boat hull can lead to more effective repairs and a longer-lasting hull. By taking your time, using quality materials, and ensuring proper safety measures, you set yourself up for success. With these tips, you can confidently tackle any fiberglass repair and keep your boat ready for the water.
Conclusion
Repairing a fiberglass boat hull from the outside can seem daunting, but by employing effective techniques and being mindful of common mistakes, you can achieve great results. Properly preparing the surface is crucial; ensure that you thoroughly clean and sand the area needing repair before applying any fiberglass mat or epoxy resin. This prep work helps ensure better adhesion and a smoother finish.
While repairing, one of the most common pitfalls is rushing through the curing process. Always allow the materials to set as per the manufacturer’s instructions, creating a stronger bond that will endure the rigors of water exposure. Additionally, using the correct type of fiberglass and resin for your specific hull can make a significant difference in both appearance and longevity.
Another frequent mistake is neglecting to use protective gear. Fiberglass repair requires handling materials that can irritate the skin and lungs. A good practice is to wear gloves, masks, and goggles to protect yourself during the process.
By focusing on these effective techniques and staying clear of common errors, you not only enhance the durability of your boat’s hull but also improve its overall performance. Remember, consistent maintenance and timely repairs will prolong the life of your fiberglass boat, keeping it seaworthy and a joy to navigate.
Embracing these strategies ensures not just a successful repair, but also a rewarding experience as you witness your boat return to its former glory. With patience and the right approach, you’re well on your way to enjoying many more adventures on the water.